An Overview: What is Resin Art?
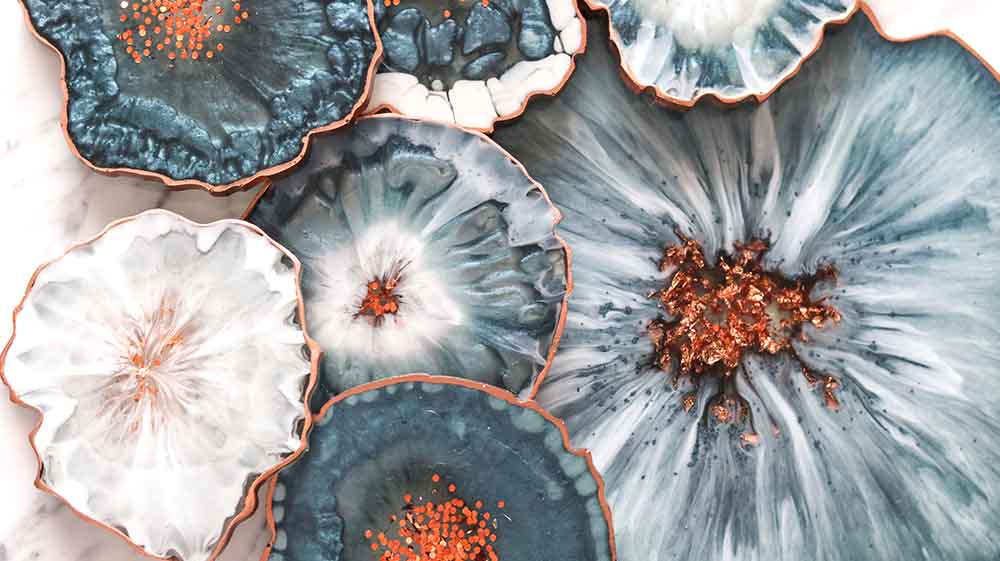
You must have come across pieces of high-quality art that have a lot of effects and materials added to them. Be it making ‘crystals or a marbled coaster, resin art makes all these possibilities come true. It is a type of painting and/or artwork that is liquid and does not require any brushes generally. This is why resin art has become so popular. It is an easy way to make art pieces that are beautiful and can have a lot of utility as well. It is called epoxy resin art because the main chemical used to create resin work is epoxy. Epoxy is the medium through which you will be able to find different pigments and designs.
What can be Made from Resin Art?
Resin art has become popular because the possibilities are endless with resin artwork. Whether you want new artwork for your room or you want to create beautiful plaques for your friends - all this is possible with resin art. You can also try making frames, keychains and jewellery, even resin crystals depending on the kind of materials and moulds you can get your hands on.
What are the Different Types of Resin Art?
Epoxy Resin:
The most common type of resin art is epoxy resin art. It is very easy to handle this material because it has very strong adhesive qualities and is heat resistant as well. It is easy to coat this resin with all kinds of materials to create a strong bond. However, the only disadvantage of epoxy resin is that it may be a little expensive for people to try on their very first try for resin art.
Polyester Resin:
This is where you see polyester resin come into the picture. It is created from the mixture of dibasic organic acids and polyhydric alcohols that result in the formation of a strong resin. It is a much more economic option than epoxy resin.
Phenolic Resin:
This is a thermosetting resin that has a high resistance to chemical wear- and- tear. This will elongate the life of the art work and resin art work you generate with phenolic resin. It will prevent moisture and chemical weathering. It is mostly used to bond other adhesives and even tiles together.
Silicone Resin:
It is also a common resin that most artists use along with epoxy resin because this resin is water-repellent in extremely high temperatures as well. This is why silicon resins are commonly used with laminations and other water-resistant materials.

What Items are Required for Resin Art?
The most basic materials that you will need for resin art are:
Canvas:
You can take normal wooden acrylic canvases. They are easily available in the market in a variety of shapes and sizes. You can choose any size you like.
Resin:
This may seem like an obvious item on the list but you need to know which resin to buy. The most common and easily available options are epoxy resin and silicone resin. Since this is the first time you will be buying resin, you cannot forget to buy the hardener. The hardener will usually come with the resin. However, be sure to check the resin for a hardener as well. The usual ratio for the resin and hardener is 1: 1.
Disposable Cups:
You will need a neutral material to mix the resin and hardener that you can easily get rid of because whatever material you use to mix the resin in will harden as well. This is why you need a relatively economical option to ensure that you can easily get rid of it after you have created your piece of artwork.
Popsicle Sticks:
You will also need a neutral material to mix the resin and hardener so that you can easily mix the materials. You will need to get rid of this mixing medium as well. Popsicle sticks are the easiest answer to this issue as well.
These are the most basic materials you are going to need when you start making resin art. You may need some additional materials depending on the design and product you are trying to make. For example, you may need wood or moulds to give shape to resin for artwork.
How to Make Resin Art for Beginners?
Once you have acquired all the materials, you need to follow some steps to create the desired DIY resin art you have always wanted. There is a technical process that needs to be followed if you want the full effect and result of the resin art you are trying to create. You must read these instructions carefully and do your due diligence with research on all materials you are dealing with. This is because resin art is ultimately the amalgamation of certain chemical reactions.
Step 1: Prepare the wood
You need to cut the wood into the desired size and dimensions that you would like to work with. You need to ensure that the wood is smooth and does not have any rough edges. There are multiple reasons for doing so. Primarily, you will need a smooth surface to ensure that all the effects of the resin you are using are highlighted.
Step 2: Add a Primer
Add the advised layer of primer on the wood to give the paint a smooth surface to spread on and to stick to effectively. Without a primer, the paint will take on the texture and colour of the wood, if you are directly applying the paint. This will not give you the results you wanted.
Step 3: Planning the Colours
This is the space for you to show your creativity and let your imagination run wild. You can add a variety of textures to your resin artwork by layering it in with the other layers as the base colour dries and hardens. You need to ensure that each layer has dried off completely before adding anything new to the canvas. You will have to make a separate cup as per colour, if that is the effect you are going for.
Step 4: Mixing the Resin
You have finally reached the step you have been so eagerly waiting for. Mixing resin is the easiest part of this entire process. The ratio of the resin and hardener is 1:1 unless specified otherwise. You must ensure that this ratio has been met correctly. However, you need to be quick now because the resin will be activated as soon as it touches the hardener. This is also why you cannot keep mixing the resin endlessly. It is best advised that you add the hardener a bit at a time to ensure that everything has been incorporated well together.
Step 5: Pouring the Resin on the Canvas
This is the moment that you have been thinking about all this while. You must think of the colour scheme and the way you want to pour what and when. This sequence will give you an idea of what the result will look like. However, since you are just starting, you should try to be as free as you can with your first pour and wait for the resin to surprise you .
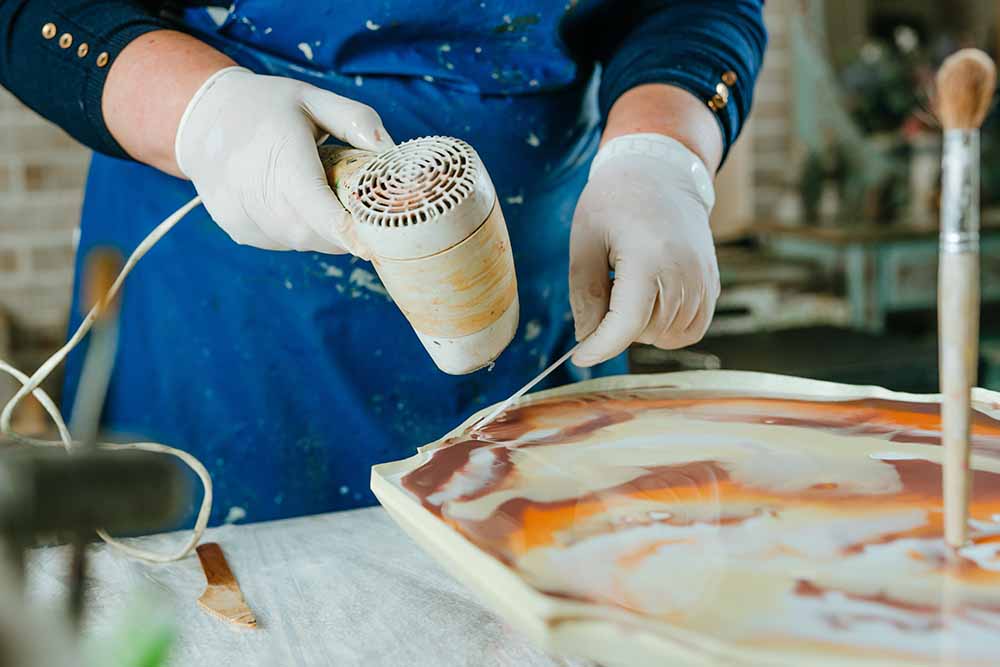
Step 6: Switch on the Heat Gun
If you do not want to end up with a patchy and awkwardly constructed resin art with a lot of bubbles in it, you need to go over the piece wherever you can see bubbles. These bubbles can be quite a menace and you will be able to see them clear as day even as the resin has completely dried out. They do not just go away on their own.
What are Some Safety Measures to Take While Creating Resin Art?
You are directly dealing with chemicals that you have not necessarily used before. Even if you are an artist and you are trying resin art for the first time, there are some safety measures that you need to take when you are creating resin art:
Protective Clothing:
You must always wear protective clothing. This simply means that the clothes should be full-sleeved and your feet should be covered.
Gloves:
You do not want the chemicals and resin to directly touch your skin. You may get an allergic reaction.
Protective Goggles:
Your eyes may just be constantly exposed when you are dealing with chemicals. There is no going to be an outward reaction. However, you do not know how your eyes will react to a particularly new chemical.

What are Some Common Mistakes While Creating Resin Art?
There are some common mistakes people do while creating resin art:
Removing the Mould Too Fast:
This is a common mistake because people are just too excited to see their creations. This is a very normal reaction but you need to give the resin time to settle and harden properly.
Mixing the Resin Mixture Too Much:
As soon as the resin and hardener meet, the chemical process will start. You cannot waste a lot of time mixing. You need to know exactly how long to mix to ensure the perfect result.
Here are Some Expert Tips for Resin Art Creation
The only step most first-timers tend to skip is going over their creation with a heat gun as soon as they have poured the resin on the canvas. You cannot do this step after the resin has started to bond with the canvas. The heat gun may just disrupt that process as well. This is why you need to be quick when you are working with resin.
Conclusion
Resin art is ultimately about your creativity. You will get the hang of the technicalities after a few tries. You will then be able to try on more complicated processes with resin. This is just the first stepping stone into the world of resin creations.
FAQs
Is it safe to work with epoxy resin?
Epoxy resin is a very stable compound to work with. However, you are still dealing with a chemical. You must take basic precautions.
What is the easiest way to ruin a resin artwork?
There are unfortunately different ways in which you can ruin a resin artwork. However, that is true for any technique of art. This is why you must research and understand everything about resin art.