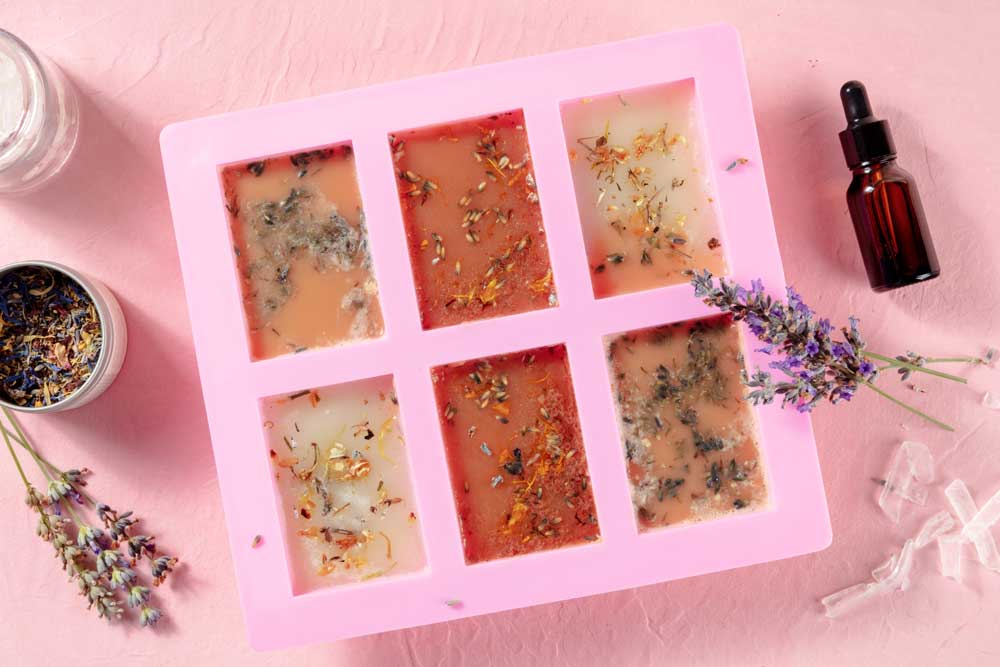
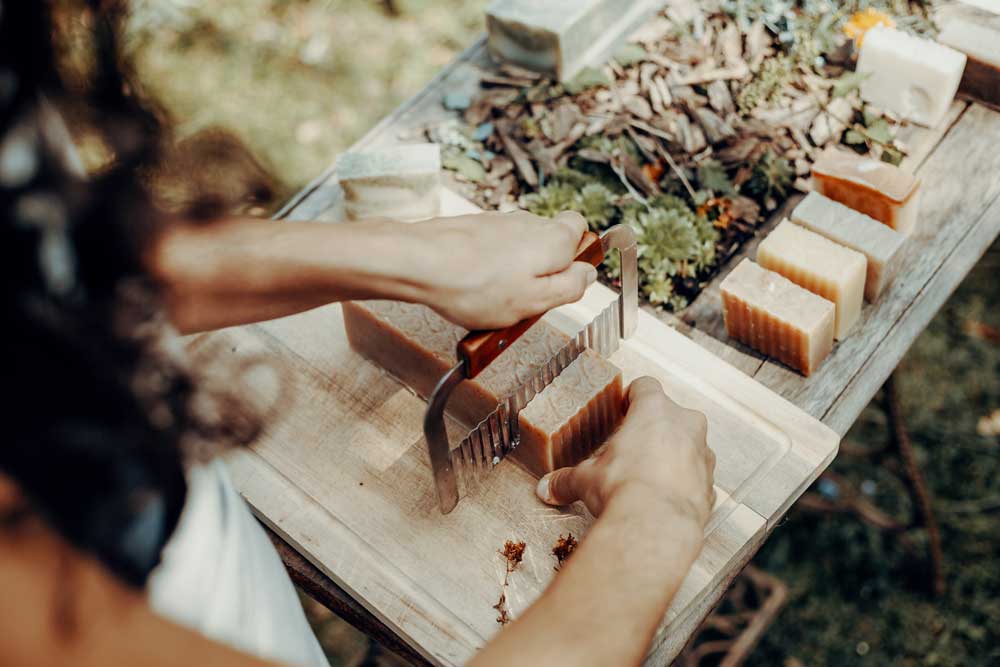
Making soap at home is a rewarding, sustainable and creative process that allows you to control the ingredients and customise the scent, colour, and texture to your liking. Whether you want to make soap for personal use, gifts, or even to start a small business, understanding the basics of soap making is essential. This guide will walk you through the process, from selecting ingredients to finishing your handmade soap, ensuring you create beautiful and beneficial bars right in your kitchen.
The process of soap making, known as saponification, involves a chemical reaction between oils or fats and lye. By mastering this process, you can create natural, handmade soap that is free from harsh chemicals and additives commonly found in commercial soaps. Not only is homemade soap better for your skin, but it also offers endless possibilities for customisation. You can choose from a variety of oils, essential oils, natural colourants and additives to create a soap that suits your preferences and skin type.
One of the greatest benefits of making soap at home is the ability to tailor it to your needs. For instance, if you have sensitive skin, you can use gentle, moisturising oils like olive oil and shea butter. If you enjoy invigorating scents, you can experiment with essential oils like peppermint or eucalyptus. The possibilities are truly endless, allowing you to create a unique product every time.
Additionally, making soap at home is a cost-effective alternative to purchasing high-end artisanal soaps. By buying ingredients in bulk, you can produce large batches of soap at a fraction of the cost of store-bought equivalents. Plus, the homemade touch adds a personal element that makes your soap ideal for gifting. Whether for holidays, birthdays or just because, homemade soap makes a thoughtful and appreciated present.
Furthermore, the process of making soap can be incredibly therapeutic. The methodical steps, from measuring and mixing to moulding and curing, provide a satisfying hands-on experience. It’s an opportunity to disconnect from the digital world and engage in a tactile, creative activity. Many soap makers find the process meditative, enjoying the quiet focus it brings.

Basic Ingredients Required to Make Soap
To start your soap-making journey, you'll need a few basic ingredients. These components are the foundation of most soap recipes and can be easily customised to create your desired soap:
1. Lye (sodium hydroxide): Essential for the saponification process
2. Oils/fats: Common choices include olive oil, coconut oil, palm oil and shea butter
3. Distilled water: Used to dissolve the lye
4. Essential Oils: For fragrance and therapeutic benefits
5. Additives: Natural colourants, exfoliants like oats or seeds and herbs for texture and appearance
How to Make Soap at Home
Step 1: Safety First
Before you begin, ensure you have the proper safety gear. Lye is a caustic substance and can cause burns. Wear gloves, goggles and long sleeves to protect your skin and eyes.
Step 2: Prepare Your Workspace
Cover your work area with newspaper or plastic to protect surfaces from spills. Have all your ingredients measured and ready.
Step 3: Mix the Lye Solution
Carefully add lye to distilled water (never the other way around) in a well-ventilated area. Stir until the lye is completely dissolved and let the solution cool to about 100-120°F.
Step 4: Melt and Mix Oils
In a large pot, melt your chosen oils and fats over low heat. Once melted, let the oil mixture cool to the same temperature range as the lye solution.
Step 5: Combine Lye Solution and Oils
Slowly pour the lye solution into the oils, stirring continuously. Use an immersion blender to mix until the mixture reaches ‘trace’, a point where it thickens and leaves a trail when drizzled over itself.
Step 6: Add Fragrance and Additives
Once trace is achieved, add your essential oils, natural colourants, and any other additives. Stir thoroughly to distribute evenly.
Step 7: Pour into Moulds
Pour the soap mixture into your prepared moulds, smoothing the top with a spatula. Cover the moulds with plastic wrap and a towel to insulate.
Step 8: Cure the Soap
Allow the soap to set in the moulds for 24-48 hours. Once firm, remove the soap from the moulds and cut it into bars. Place the bars on a rack in a cool, dry place to cure for 4-6 weeks. This curing process allows the soap to harden and the lye to fully react with the oils, making the soap safe to use.
Soap Finishing Steps
After the curing period, your soap bars are ready for the finishing touches. Trim any rough edges with a knife or vegetable peeler. If desired, stamp your soap with a custom design or wrap them in decorative paper. Properly storing your soap in a dry, well-ventilated area will help maintain its quality and longevity.
Tips for Soap-Making
1. Measure accurately: Precise measurements are crucial for successful saponification.
2. Experiment with additives: Try different natural additives like oatmeal, honey or dried herbs for unique textures and benefits.
3. Use quality ingredients: High-quality oils and essential oils make a significant difference in the final product.
4. Be patient: The curing process is essential for soap quality. Don’t rush it.
5. Keep a soap journal: Document your recipes and experiments for future reference.

Conclusion
Making soap at home is not only a practical skill but also a delightful creative outlet. By following the steps outlined in this guide, you can produce natural, handmade soap tailored to your preferences and needs. Whether you aim to create luxurious gifts or develop a new hobby, soap-making is a rewarding endeavour that combines art, science and a touch of personal flair.
The satisfaction that comes from creating something beautiful and useful with your own hands is unmatched. Each bar of soap you produce is a testament to your creativity and craftsmanship, a unique blend of ingredients and personal touches that cannot be replicated in mass-produced commercial products. The ability to customise your soap means you can cater to specific skin types and preferences, making each bar as beneficial as it is beautiful.
Moreover, the knowledge and skills gained from soap-making extend beyond the craft itself. You'll develop a deeper understanding of the properties of different oils and natural additives, learning how they interact to create various textures and benefits. This knowledge can enhance your appreciation for natural skincare and potentially lead to other DIY endeavours, such as making lotions, balms, or bath bombs.
Soap making also fosters a sense of mindfulness and relaxation. The process requires patience and precision, encouraging you to slow down and focus on each step. The rhythmic actions of stirring, pouring, and cutting can be meditative, providing a break from the hustle and bustle of everyday life. The aromatic scents of essential oils further enhance this calming experience, turning your kitchen into a mini spa.
For those considering soap making as a small business, the possibilities are exciting. Handmade soap is a popular and growing market, with consumers increasingly seeking natural and eco-friendly alternatives to conventional products. By experimenting with different recipes and packaging, you can create a brand that reflects your values and appeals to a niche audience. Whether selling at local markets, online, or through partnerships with boutiques, the entrepreneurial potential of soap making is vast.
Furthermore, making your own soap is a step towards a more sustainable lifestyle. By choosing natural ingredients and minimising waste, you contribute to environmental conservation. You can source ingredients ethically, support local suppliers, and reduce plastic usage by opting for reusable moulds and eco-friendly packaging. Every bar of soap you make at home is a small but significant contribution to reducing your environmental footprint.
In essence, soap making at home is an enriching practice that goes beyond creating a product. It is an expression of creativity, a form of self-care, and a commitment to sustainability. Whether you’re drawn to the artistry, the science, or the simple joy of crafting, soap making offers a fulfilling and versatile hobby. So, gather your ingredients, don your safety gear and immerse yourself in the delightful world of homemade soap. The bars you produce will not only cleanse your skin but also bring a sense of accomplishment and joy to your daily routine.
FAQs
What is saponification?
Saponification is the chemical reaction between lye and fats/oils that produces soap and glycerine.
Can I use any type of oil for soap making?
While many oils can be used, some are better suited for soap making due to their properties. Common choices include olive oil, coconut oil, and shea butter.
How long does homemade soap last?
Properly cured and stored handmade soap can last up to a year. Avoid excessive moisture and heat to extend its shelf life.
Can I make soap without lye?
No, lye is necessary for the saponification process. However, once the soap is made, no lye remains in the final product.
What can I use to colour my soap naturally?
Natural colourants like turmeric, cocoa powder, spirulina and activated charcoal can be used to colour soap.